

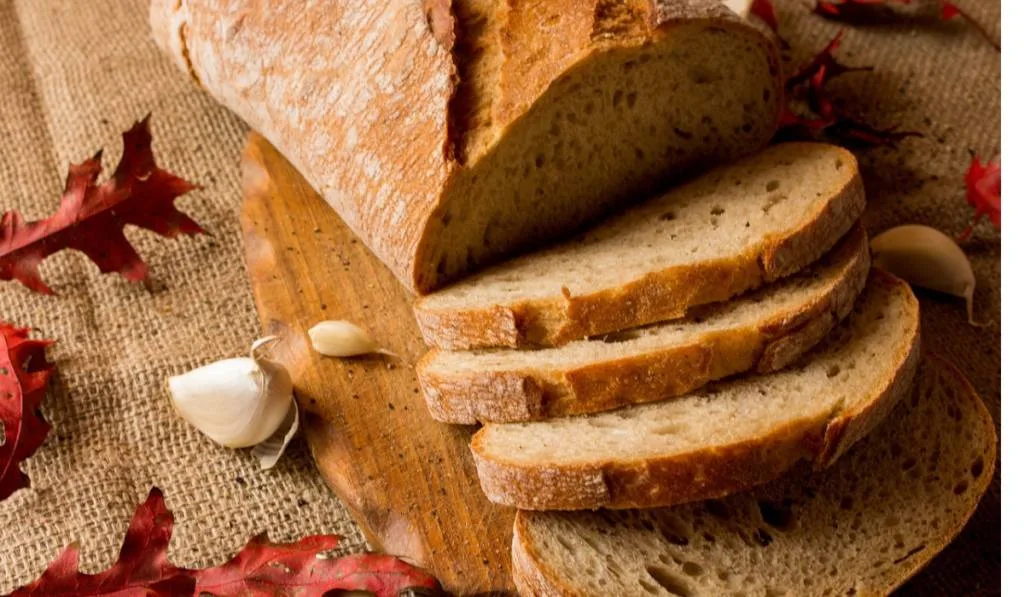
Grandma always said there was nothing better in life than a couple of slices of freshly baked homemade sourdough bread, smothered in lashings of butter and jam. Her technique in producing the perfect slice was. . .
The best way to slice homemade sourdough bread is to hold the bread firmly in place with one hand on a cutting board. Then, with a knife in the other, begin cutting. Don’t press down too hard, rather allow the knife to slice through the bread using a forward and backward motion. Don’t rush, allow the motion to do the work and you’ll find your bread slices a lot more neatly. Make sure that you hold your cutting knife parallel to the cutting board and not angled down.
She also said that there were two ways of slicing homemade sourdough bread, the before and after. I’ve started with the after, when that decadent loaf of pure heaven comes out of the oven.
Getting the evenest of slices possible
You’ve just baked the perfect piece de resistance. A sourdough loaf that not only looks awesome and scrumptious, its aroma filling the room, but crispy and appetizing. You cut into it, expecting impressive, even slices but instead, what do you get? A sorry heap of not-so-good-looking sourdough bread slices. Some are thick, some are thin, but the majority don’t even look like slices. Why? You ask. What did I do wrong?
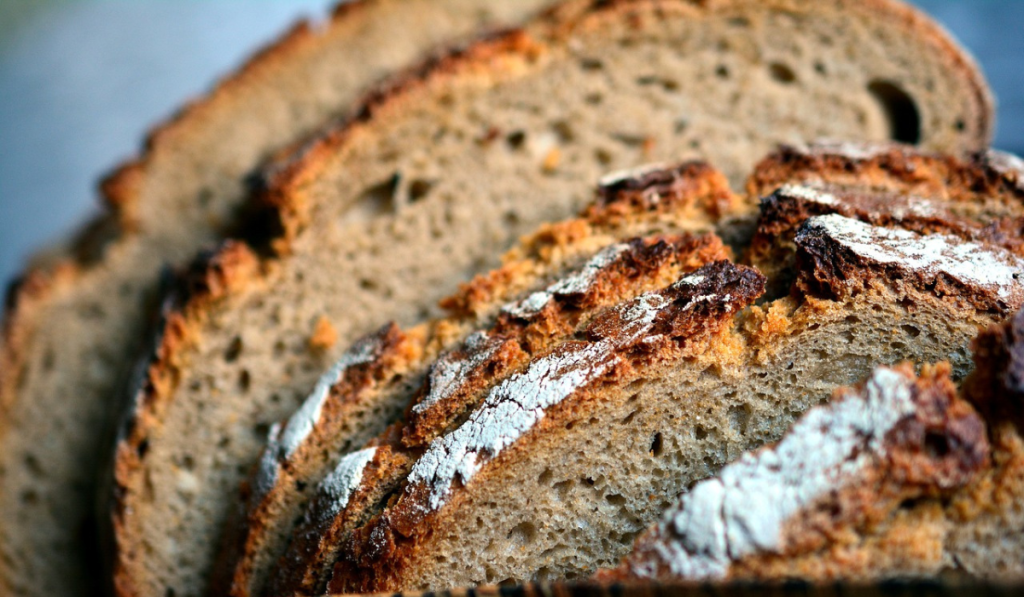
To get those even slices we see in magazines, we need our sourdough bread to cool down to room temperature. It’s essential to wait for this to happen because sourdough bread continues to cook through the cooling process. It has to be cool for us to get those even slices with the perfect interior crumb.
How long we need to wait will depend on the size of the sourdough loaf we are baking.
Why wait to slice through sourdough bread?
An interesting and unique characteristic of sourdough bread is that it needs longer than other homemade breads to cool before slicing.
Exactly how long one needs to wait will depend a lot on what type of flour was used in the baking process.
An average loaf of normal homemade bread (+- 1.5lbs) would take around two hours to cool. A sourdough loaf of the same size would take four hours. However, if rye flour was used, the cooling-off time could be anywhere between twenty-four and forty-eight hours to get the best slices. This is because rye has a much higher moisture retention rate.
Cutting sourdough bread before it’s cooled
Every baker has, at one time or another, eaten freshly-baked bread directly from the oven. Some say it’s the sweet smell of the yeast, while others swear by its comforting aroma. Both, they say, are irresistible. But they know they should have waited for the bread to cool.
The texture of the sourdough bread will, at this point, be too moist, and its structure would not have settled.
Three things happen when trying to slice warm sourdough bread.
- The bread will squash when slicing into it.
- The bread will stick to the knife, making it virtually impossible to produce anything that resembles a slice.
- The dough in the middle of the loaf will be gluey and dense.
Remember that the baking process of bread continues during the cooling stage. If you slice into the bread before this process is complete both the bread’s heat and moisture will dissipate too quickly, and render the bread undercooled.
You’ll know that this has happened if . . .
- You find the crust and sides of the bread can’t withstand the knife pressure.
- The slices tear as you cut because the crumb is too soft, and the loaf still has too much moisture.
- As you slice the knife sticks inside the bread, damaging its structure.
- You’ll find that the bread will later develop a drier texture, because of moisture escaping too quickly.
Cutting sourdough bread long after it has cooled
You’ll find that if you leave your sourdough bread to cool for too long a period, you lose some of the bread’s moisture and texture. Though it may be easier to get even slices, the bread itself will be a lot tougher to slice into. The crust and sides would have hardened more than they should have.
The results of overcooling . . .
- The crust will be way too hard and the bread difficult to cut into.
- The inside of the bread will have lost some of its elasticity, it will be drier and firmer than it should be.
- The loaf itself will become stale faster than it should.
Points to remember when cutting sourdough bread perfectly every time

Slicing sourdough bread can be tricky, especially if it’s crusty.
- Allow your sourdough loaf to cool properly before slicing into it. Remember, it has a higher moisture content than other homemade breads.
- It’s easier to cut sourdough bread at room temperature. Remember that it continues to cook while it cools.
- To cut sourdough bread evenly, you need the correct bread knife to do the job. The knife has to have a long serrated blade, able to cut through hard crust while keeping the bread inside intact.
The second part of the best way to slice homemade sourdough bread — before it goes into the oven
Often the question is asked, why do I need to slice my sourdough loaf before it goes into the oven? Very simply, if you don’t slice your dough before it goes into the oven, the gasses that develop during the baking process will find their way out, sometimes with catastrophic consequences.
How do you cut sourdough bread before baking?
The technique of slicing sourdough before going into the oven is called scoring. This is literally slashing the surface of the sourdough bread. If you don’t, an effect known as oven spring will occur as your dough rapidly expands when it’s first placed into a hot oven.
Note: If you want to learn more about oven spring and how to master it, read my guide “Awesome Sourdough Oven Spring in 10 Easy Steps!“
Scoring your first loaves can be somewhat daunting at first. Here is how you can get started.
Choosing a pattern. One of the easiest patterns to accomplish is called the hashtag cut. With your blade at a forty-five-degree angle slash two straight lines on top of the dough. Once you’ve mastered the hashtag, moving onto more complicated designs is a breeze.
Make your cuts deep and swift. Your cuts must be deep enough to allow the sourdough bread to expand. Speed is critical in the scoring stage as haphazard cuts, and hesitation can cause tears in the bread.
For different types of sourdough loaves use different scoring patterns. For long loaves try small diagonal slashes and for round loves the single or hashtag-shaped scores.
What is the purpose of scoring bread?
Scoring sourdough bread prevents the loaves from cracking in unwanted places. This action helps control the breading process of expansion.
The fold on top that appears after you score your sourdough is also called ear. To learn more about it, read my guide “How to Get an Ear on Sourdough?”
What do you slice sourdough with?
There are three basic tools that home and professional bakers use to score sourdough bread.
- The Lame: the correct way to pronounce this word is ‘Lahm.’ A thin, curved blade that’s attached to a longish stick for control. It’s a professional tool and can be bought either from a catering supply company or directly online.
- Razorblade: a double-edged razor blade will work wonders and it’s sharper and thinner than a single-blade. The only proviso in using it is to be careful.
- Paring knife: Many home bakers, rather than using a lame or razor blade, prefer a sharp paring knife. The knives themselves can have both flat and curved blades.
Note: Learn more about choosing the right knife to slice your sourdough bread loaf with in my article “Choosing a Knife for Sourdough Bread: Full Guide“
Why does my sourdough deflate after I slice it?
Your sourdough bread will always deflate a little. This is because the dough releases some of the natural gas it’s accumulated. If, however, the sourdough falls flat, it means that you’ve over-proofed the dough. You’ve let the dough rise too long.
What do I do now?
If your sourdough continues to deflate and lose its shape, there are a few things you can do.
- Check on the type of flour you are using. Whole-wheat flour, for example, absorbs more water than all-purpose flour. This will leave your dough a little drier and less sticky.
- If your sourdough falls flat and doesn’t rise well, check its gluten development. Sourdough that holds its shape indicates a well-developed gluten network.
- Do you use a banneton (basket that prevents sideways spread of wet, moist dough) when proofing your dough? If you don’t this could cause your dough to flatten out, as the dough has no support during the proofing process.
- Was the sourdough over-proofed?
- Was your dough shaped correctly?
- Was the dough too moist?
Conclusion
There’s a lot to remember when slicing homemade sourdough bread. Be patient, and follow instructions to a T, and you’ll soon be getting great results. Happy baking!


Hi, ich bin Aysha
Ich liebe es, nützliche Inhalte zu erstellen, damit du lernen kannst bessern Sauerteig herzustellen.
Wenn dir meine Inhalte gefallen, ziehe bitte in Erwägung, mir hier ein kleines Trinkgeld als “Dankeschön” zu hinterlassen. Ich schätze deine Freundlichkeit und Unterstützung sehr 🙂
Join Us and Transform >
Don’t Be an Amateur! Master the Art of Sourdough Bread!

Aysha, your post took me back to my early sourdough days! I remember slicing into my first loaf, only to watch it deflate before my eyes. Could my oven’s heat have been inconsistent? Or was it my scoring technique? I’ve since discovered that allowing the loaf to cool completely before slicing helps maintain its structure. Also, using a bread lame for scoring can make a world of difference. Anyone else have tips on scoring techniques or oven calibration? Let’s turn deflated sourdough frowns upside down! 😊🥖