
Struggling with a sluggish sourdough starter? Wonder why it’s not bubbling with life? Let’s dive into the world of sourdough starters and unlock the secrets to getting yours active and bubbly, ready to bake! Learn how to activate sourdough starter effectively and watch as your baking transforms overnight.
TL;DR
- Understand the science behind activating your sourdough starter.
- Learn step-by-step how to revive a dormant starter.
- Discover the best flours and feeding routines for optimal activity.
- Gain insights into maintaining your starter’s health long-term.
- Pick up secret tips from experienced bakers.
Unleashing the Power of Your Sourdough Starter
Initiating the process of activating a sourdough starter can seem daunting, but understanding the basic science behind it demystifies the steps you need to take to ensure a vigorous ferment. Your starter thrives on a diet of flour and water, relying on wild yeast and bacteria to create its magic.
The Basics of Activation
The first step in activating your sourdough starter is to establish a consistent routine that accommodates the natural living environment of wild yeasts and bacteria. Here’s how to lay the groundwork:
- Temperature Control: Yeasts are highly sensitive to temperature changes, and maintaining an ambient temperature between 70-75°F (21-24°C) is crucial. This range is ideal as it promotes rapid yeast activity without risking the overproduction of unwanted bacteria.
- Feeding Schedule: Consistency in feeding not only revitalizes the starter but also ensures a balanced growth of yeast and bacteria. Feed your starter with equal parts flour and water, preferably every 12 to 24 hours, depending on the room temperature and the starter’s response.
- Flour Quality: The type of flour you use significantly impacts the health of your starter. Unbleached, whole grain flours are preferred because they retain more natural sugars and minerals which feed the yeast. These flours also contain more enzymes, which help break down complex sugars into simpler forms that yeast can easily consume.
Understanding these basic principles will help stabilize your sourdough starter and prepare it for more advanced growth techniques.
Advanced Techniques for Optimal Growth
After mastering the fundamental aspects of sourdough starter care, you can explore advanced techniques to enhance its activity and flavor profile:
- Hydration Levels: Adjusting the water content in your starter can significantly affect its texture and activity. A ‘wetter’ starter tends to be more vigorous, as more water facilitates yeast movement and feeding. Experiment with hydration levels to see what works best for your specific baking environment and flour type.
- Variety of Flours: Experimenting with different types of flours can introduce new flavors and change the fermentation dynamics. Incorporating a portion of rye or whole wheat flour, for instance, can accelerate fermentation and enhance the flavor complexity due to their nutrient-rich composition.
- Intermittent Fasting: Sometimes referred to as the ‘discard cycle,’ periodically removing a portion of your starter and not feeding it for 12-24 hours can stress the yeast, which might seem counterintuitive but can actually lead to more robust growth when feeding resumes.
These advanced techniques not only improve the vigor and resilience of your sourdough starter but also enhance the overall quality and taste of your sourdough baked goods. Embrace these methods to see a noticeable improvement in both the activity of your starter and the delicious complexity of your breads.
Step-by-Step Guide to Activate Your Starter
Reviving a dormant or initializing a new sourdough starter is an intricate process that, when done correctly, sets the foundation for all your sourdough baking needs. Here’s a detailed guide to ensure that your starter develops with vigor and vitality:
Step 1: Assess Your Starter’s Current Health
Begin by examining the current state of your sourdough starter. It’s crucial to identify any unusual odors or colors that might indicate contamination or neglect. A healthy starter should have a pleasant, slightly tangy smell with no hints of rancidity, and its color should be consistent with the flour used (typically a creamy white for wheat or a slightly grayer tone for whole grain flours). If you detect any mold (usually seen as pink, black, or orange spots), it’s safest to discard the entire batch and start anew.
Step 2: Discard and Replenish
This step, often referred to as ‘refreshing’ the starter, involves removing about half of your existing starter. This discard helps regulate the acidity and concentration of yeast and bacteria, ensuring a more active and healthy culture. Replace the discarded portion with fresh, equal parts of flour and water by weight. For example, if you discard 100 grams of starter, replenish it with 50 grams of water and 50 grams of flour. This feeding restores vitality and encourages the yeast and bacteria to feed and multiply.
Step 3: Mix to a Smooth Consistency
After adding fresh flour and water, mix the contents vigorously to incorporate air and distribute the food sources (flour and water) evenly. Ensure there are no dry lumps of flour; a smooth, homogenous mixture is ideal. This not only helps activate the yeast but also ensures that the texture of your starter remains consistent, which is crucial for predictable fermentation activity.
Step 4: Cover and Observe
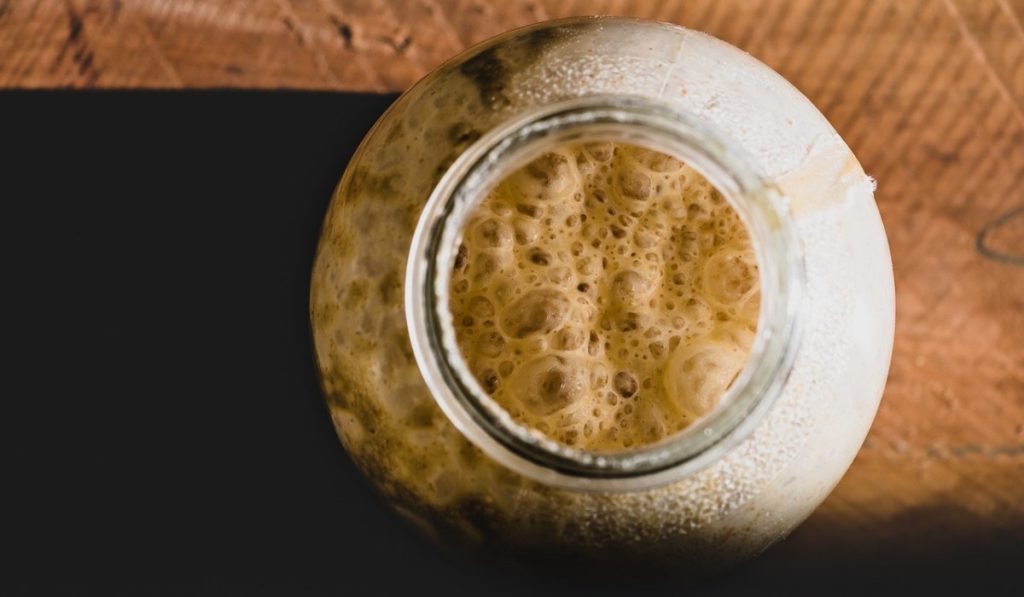
Once your starter is refreshed and well mixed, cover the container loosely with a cloth or a loose lid to allow some air exchange without drying out the surface. Place the container in a spot with a stable temperature, ideally between 70-75°F (21-24°C), away from direct sunlight. Over the next 24 to 48 hours, watch for signs of activity: an increase in volume, bubbling throughout the starter, and a pleasant, yeasty aroma. These signs indicate that the yeasts are active and the starter is healthy. If your starter hasn’t shown much activity within 48 hours, continue with daily feedings and keep monitoring its progress.
By following these detailed steps, you’re setting your sourdough starter on the path to becoming a robust and reliable component of your baking adventures, capable of leavening bread and adding characteristically tangy flavors.
Maintaining Your Sourdough Starter Long-Term
Maintaining an active sourdough starter is a rewarding yet intricate endeavor that requires a clear understanding of its needs and lifecycle. This continuous care is not just about feeding; it’s about creating a stable environment that fosters growth and prevents degradation over time.
Regular Feeding and Hydration
A well-maintained starter needs a consistent feeding schedule to ensure it has sufficient food to stay active and healthy. This involves feeding it with equal parts (by weight) of flour and water. For starters kept at room temperature, daily feeding is ideal. However, if you store your starter in the refrigerator, a weekly feed should suffice. The consistency of your feedings contributes to the stability of the starter’s microbial community, making it more resilient and reliable for baking.
Proper Storage
The environment in which you store your sourdough starter can significantly impact its health. For long-term maintenance, the refrigerator is a safe choice as it slows down the activity, requiring less frequent feedings. However, make sure the container is only loosely covered to allow gases to escape and prevent any pressure buildup. Whenever you plan to bake, take the starter out of the fridge at least a few hours beforehand to warm up and become active again.
Rest Periods
Understanding when to give your starter a break is crucial, especially after periods of intense activity or when you notice it’s beginning to show signs of exhaustion, such as sluggish rise or less bubbling. In such cases, allowing your starter to rest in the refrigerator for a few weeks can help. Just ensure it’s fed before you put it away and once every 2 to 3 weeks during its rest period to maintain viability.
Troubleshooting Common Issues
Even with the best care, sourdough starters can sometimes run into problems. Here’s how to troubleshoot some common issues:
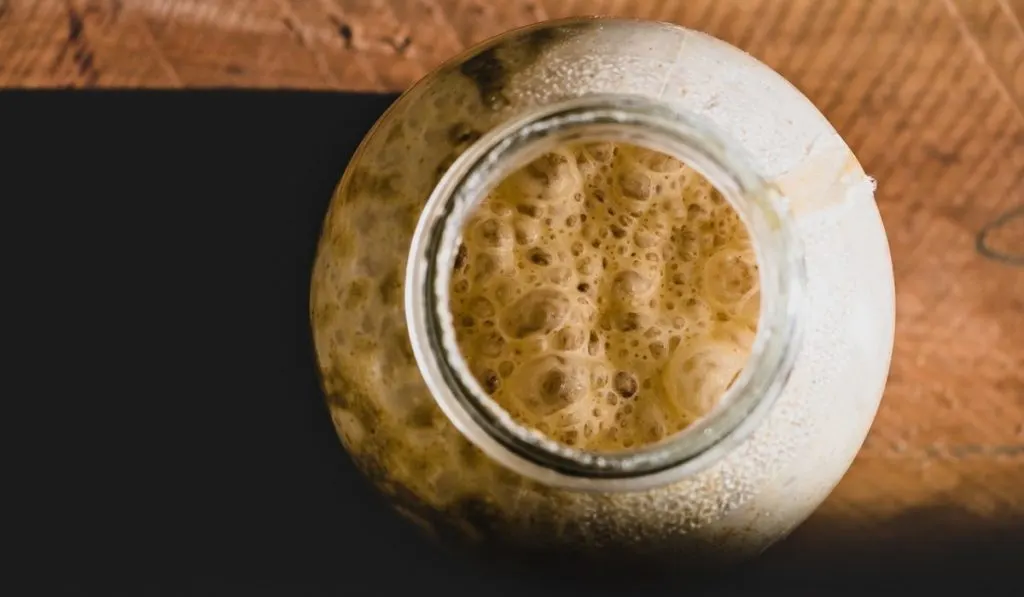
Lack of Bubbles
If your starter isn’t showing the lively bubbling expected, it could be a temperature issue. Starters are more active in warm environments (ideally around 70-75°F). If your kitchen is on the cooler side, consider finding a warmer spot or using a proofing box. Also, review your feeding ratio and schedule as an underfed starter or one that’s fed too infrequently might lack the energy to produce bubbles.
Off Smells
Sourdough starters should have a pleasantly tangy smell, not sour or rancid. If you notice unpleasant odors, this could be a sign of bacterial contamination or yeast imbalance. To address mild odor issues, increase the frequency of your feedings to twice a day and make sure each feeding consists of fresh, high-quality flour and clean water. If the problem persists, consider discarding all but a small amount of your starter and rebuild it with fresh feedings over several days.
By adhering to these detailed practices for maintenance and troubleshooting, you’ll not only keep your sourdough starter healthy in the long term but also enhance its flavor and leavening power, making every bake better than the last.
Conclusion
Activating and maintaining a sourdough starter connects you to the art of traditional baking. Embrace the journey of bringing your starter to life with these insights, and enjoy the remarkable flavors and textures in your homemade bread. Remember, the key to a vibrant starter is understanding its needs and responding with care. Happy baking!
Frequently Asked Questions
How often should I feed my activated sourdough starter?
Feed your active starter daily if kept at room temperature, or weekly if refrigerated.
What is the best flour to use for feeding my sourdough starter?
Whole grain flours, like rye or whole wheat, provide more nutrients and fermentative potential.
How can I tell if my sourdough starter is ready to bake with?
The starter should double in size and have plenty of bubbles. It should also pass the float test: a small spoonful floated in water should swim.
Can I use tap water to feed my starter?
It’s best to use filtered water as chlorine in tap water can inhibit yeast growth.
Why is my sourdough starter developing a liquid layer on top?
This liquid, called ‘hooch,’ is an indicator that your starter is hungry and needs feeding.
Join Us and Transform >
Don’t Be an Amateur! Master the Art of Sourdough Bread!

Leave a comment