

Starting a sourdough starter might seem daunting, but it’s an essential skill for every baking enthusiast looking to make the perfect loaf of homemade bread. The process can be tricky, and many find themselves frustrated when things go awry. But don’t worry; we’re here to guide you through every step, from understanding the basics to mastering the nuances that make all the difference.
TL;DR
- Learn how to start and maintain a sourdough starter with simple ingredients.
- Understand the science behind sourdough and why it’s beneficial for baking.
- Discover tips and tricks to avoid common pitfalls in the sourdough starter process.
- Explore ways to incorporate sourdough into various recipes for versatile baking.
- Gain insights from experts and seasoned bakers to enhance your sourdough skills.
What Is a Sourdough Starter and Why Do You Need One?
A sourdough starter is a live culture of flour and water. When combined, the natural yeast and bacteria present in our environment begin to ferment, creating a bubbly, tangy-smelling concoction that is the foundation of all sourdough bread. Unlike commercial yeast, a sourdough starter relies on wild yeast and lactic acid bacteria for fermentation, giving sourdough bread its distinctive flavor and texture.
The Benefits of Making Your Own Sourdough Starter
- Flavor: Sourdough offers a depth of flavor unmatched by bread made with commercial yeast.
- Health: The fermentation process breaks down gluten, making it easier to digest and more nutritious.
- Longevity: A well-maintained sourdough starter can last for years and even be passed down through generations.
Step-by-Step Guide to Starting Your Sourdough Starter
Getting started with sourdough requires just two ingredients: flour and water. Here’s a simple, foolproof method to create your own starter at home.
Step 1: Gather Your Ingredients
All you need is:
- Flour: Organic, unbleached flour is best. Rye flour is particularly effective for starting a culture due to its higher nutrient content.
- Water: Use filtered or bottled water, as chlorine in tap water can inhibit yeast growth.
Step 2: The Initial Mix
- Combine 1 cup of flour with 1/2 cup of water in a non-reactive container.
- Stir until you have a thick, pancake-like batter.
- Cover loosely with a cloth and leave at room temperature.
Step 3: Feeding Your Starter
For the next 5-7 days, you’ll need to “feed” your starter to build up a strong culture.
- Every 24 hours, discard half of the starter and add 1 cup of flour and 1/2 cup of water.
- Stir well and cover again.
Pro Tip: It’s normal to see bubbles, which means the wild yeast is active and fermenting. If you notice a dark liquid on top (called “hooch”), it’s a sign your starter is hungry—just pour it off and continue feeding.
Step 4: Monitoring and Adjusting
- After a week, your starter should double in size within 4-6 hours of feeding and have a pleasant, tangy aroma.
- If it’s sluggish or has an off smell, continue feeding daily and ensure it’s kept at a stable, warm room temperature.
Common Mistakes and How to Avoid Them
1. Using Bleached Flour or Tap Water
These can kill the natural yeast. Always use unbleached flour and filtered water.
2. Inconsistent Feeding Schedule
Regular feeding is crucial to maintaining a healthy starter. Set a daily routine.
3. Discarding Too Much or Too Little
Follow the discard guidelines to keep the pH levels balanced and the starter strong.
How to Tell If Your Starter Is Ready to Use
- Visual Signs: It should be bubbly and roughly double in volume a few hours after feeding.
- Aroma: It should smell pleasantly tangy or slightly fruity, not off or moldy.
- Float Test: Drop a small spoonful of starter into a glass of water. If it floats, it’s ready to use.
Beyond Bread: Creative Uses for Your Sourdough Starter
While sourdough bread is undoubtedly the most common use for a starter, the versatility of this magical ingredient extends far beyond just loaves. If you’re looking to explore new culinary avenues and make the most out of your sourdough starter, there are numerous creative and delicious recipes you can try. Here are some ideas to expand your sourdough repertoire and bring that distinctive tang and texture to various dishes:
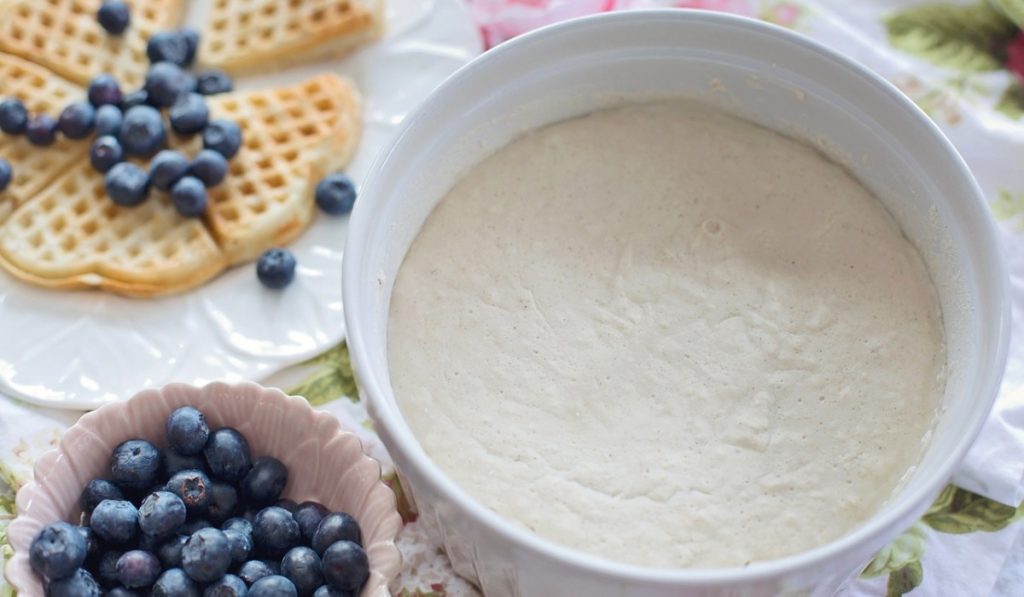
1. Sourdough Pancakes and Waffles
Using discarded sourdough starter in pancakes and waffles is a fantastic way to add depth and flavor to your breakfast favorites. The starter lends a subtle tang that complements the sweetness of syrup or fresh fruit toppings, making your morning meal far more interesting.
- How to Use It: Simply mix the discarded starter with your usual pancake or waffle batter ingredients—flour, eggs, milk, a bit of sugar, and a leavening agent like baking powder. The fermentation from the starter will give the pancakes or waffles a light and airy texture while adding a slight sourdough flavor.
- Pro Tip: Let the batter rest for 30 minutes before cooking to allow the starter to work its magic, creating even fluffier pancakes or waffles.


2. Sourdough Pizza Dough
If you love a pizza crust with a slightly chewy, flavorful bite, incorporating sourdough starter into your pizza dough is a game-changer. The natural fermentation enhances the dough’s flavor profile, adding a complex, tangy taste that pairs perfectly with a variety of toppings.
- How to Use It: Replace some or all of the commercial yeast in your pizza dough recipe with a fed and active sourdough starter. This process may require a longer fermentation time, typically an overnight rise in the refrigerator, to allow the dough to develop its unique flavor and texture.
- Pro Tip: For an ultra-crispy crust, try baking your pizza on a preheated pizza stone or cast iron skillet. The high heat will create a beautiful char on the crust, enhancing the sourdough flavor.
3. Sourdough Crackers
Homemade sourdough crackers are a delightful snack, offering a thin, crispy texture that’s perfect for dipping or enjoying on their own. They are a great way to use up excess starter without wasting any, and they provide a healthy, homemade alternative to store-bought crackers.
- How to Use It: Combine the discarded starter with a bit of flour, olive oil, and seasonings of your choice—like sea salt, herbs, or spices. Roll the dough out thin and bake until golden and crispy.
- Pro Tip: For extra flavor, brush the crackers with olive oil and sprinkle with sesame seeds, poppy seeds, or grated Parmesan before baking. These crackers make excellent accompaniments to cheese boards or charcuterie platters.
4. Sourdough Muffins and Cakes
Sourdough starter can be a surprising and effective addition to baked goods like muffins and cakes, adding moisture, structure, and a unique depth of flavor. The fermentation process can also help break down some of the gluten, resulting in a tender crumb that’s both satisfying and slightly tangy.
- How to Use It: Incorporate a small amount of starter into your muffin or cake batter. It pairs particularly well with flavors like chocolate, banana, and blueberry, where the sourdough tang enhances the sweetness.
- Pro Tip: For best results, use the starter in recipes that call for buttermilk or yogurt. The sourdough starter can mimic the acidity these ingredients provide, balancing flavors and contributing to a lighter, fluffier texture.
Additional Creative Uses for Your Sourdough Starter
- Sourdough Pretzels: Use the starter to make soft, chewy pretzels with a slightly sour flavor. They’re perfect with mustard or cheese sauce.
- Sourdough Biscuits: Add starter to your biscuit dough for a buttery, flaky treat that has a slight tang, ideal for breakfast sandwiches or simply served with butter and jam.
- Sourdough Dumplings: Enrich your soups and stews with sourdough dumplings. The starter gives them a light, fluffy texture and a wonderful flavor that pairs well with hearty dishes.
- Sourdough Cinnamon Rolls: Elevate your cinnamon rolls with a sourdough starter for a rich, complex flavor that balances the sweetness of the cinnamon sugar filling.
By thinking outside the loaf, you can fully utilize your sourdough starter and enjoy a variety of flavorful, home-baked goods that showcase the unique characteristics of this wonderful ingredient. Whether it’s a savory snack or a sweet treat, incorporating sourdough into your cooking can elevate your baking game to new heights.
Maintaining Your Sourdough Starter for the Long Haul
Once your starter is established, you don’t need to feed it every day. Here’s how to maintain it:
In the Refrigerator
- If you bake weekly, store your starter in the fridge and feed it once a week.
- Before using, bring it to room temperature and feed it 2-3 times to “wake it up.”
Long-Term Storage
- Drying: Spread a thin layer of starter on parchment paper, let it dry completely, then store in an airtight container.
- Freezing: Freeze a portion of the starter in ice cube trays. Thaw and feed it to revive.
Expert Tips for the Perfect Sourdough Starter
- Use Whole Grain Flour for the First Few Days: The extra nutrients help jump-start fermentation.
- Stay Consistent with Temperature: Room temperature is ideal. Too cold, and the starter will slow down; too hot, and it might kill the yeast.
- Hydration is Key: Keep the water-to-flour ratio consistent for predictable results.
Secret Insider Tips
As an experienced food journalist, I share some lesser-known tips to elevate your sourdough game:
- Don’t Fear the Discard: Incorporate discarded starter into everyday recipes like pancakes, waffles, and even cookies.
- Experiment with Different Flours: Each type of flour contributes different flavors and textures. Try mixing rye, whole wheat, and white flours for a complex taste.
- Patience Is Your Friend: Sourdough is a slow process that can’t be rushed. The longer fermentation time allows for better flavor development.
Conclusion
Starting a sourdough starter from scratch is a rewarding process that requires a bit of patience but yields a lifetime of baking enjoyment. With just flour, water, and time, you can create a starter that not only bakes delicious bread but also connects you to a time-honored baking tradition. Remember, the key to a successful starter is consistency and a little bit of love!
Ready to start your sourdough journey? Grab your flour, water, and let’s get bubbling!
Frequently Asked Questions (FAQs)
How long does it take to create a sourdough starter?
It typically takes about 5-7 days for a sourdough starter to be ready for baking. However, it can sometimes take longer, depending on temperature and the quality of ingredients used.
Why does my sourdough starter smell bad?
A bad smell could indicate that your starter needs to be fed or that there’s an imbalance in the bacteria and yeast. Make sure to maintain a regular feeding schedule and use the right proportions of water and flour.
Can I use different types of flour in my starter?
Yes, you can experiment with different types of flour, such as rye, whole wheat, or spelt. Each will impart unique flavors and characteristics to your sourdough bread.
What should I do if my sourdough starter has mold?
If mold appears, it’s best to discard the starter and start fresh. Mold is an indication of contamination or imbalance in the starter environment.
How can I make my sourdough starter more sour?
To enhance the tanginess of your starter, allow for longer fermentation times and use whole grain flours, which tend to produce more lactic acid, leading to a tangier flavor.
Do I have to discard some of the starter each time I feed it?
Yes, discarding part of the starter is essential to prevent it from becoming too large and to maintain a healthy balance of bacteria and yeast.
Can I store my sourdough starter in the fridge?
Yes, once your starter is established, you can store it in the fridge and feed it once a week. This slows down the fermentation process and requires less frequent feeding.
Is it normal for my sourdough starter to separate?
Yes, separation is normal and indicates the starter is hungry. Simply stir it back together and feed it as usual.
Can I freeze my sourdough starter?
Yes, freezing is a great way to store your starter long-term. Thaw it in the fridge and then feed it a few times to revive it before use.
How do I know if my starter is dead?
If your starter shows no signs of bubbles or rising after several days of feeding, or if it has a strong, unpleasant smell or visible mold, it’s best to start over.
Join Us and Transform >
Don’t Be an Amateur! Master the Art of Sourdough Bread!

Leave a comment