
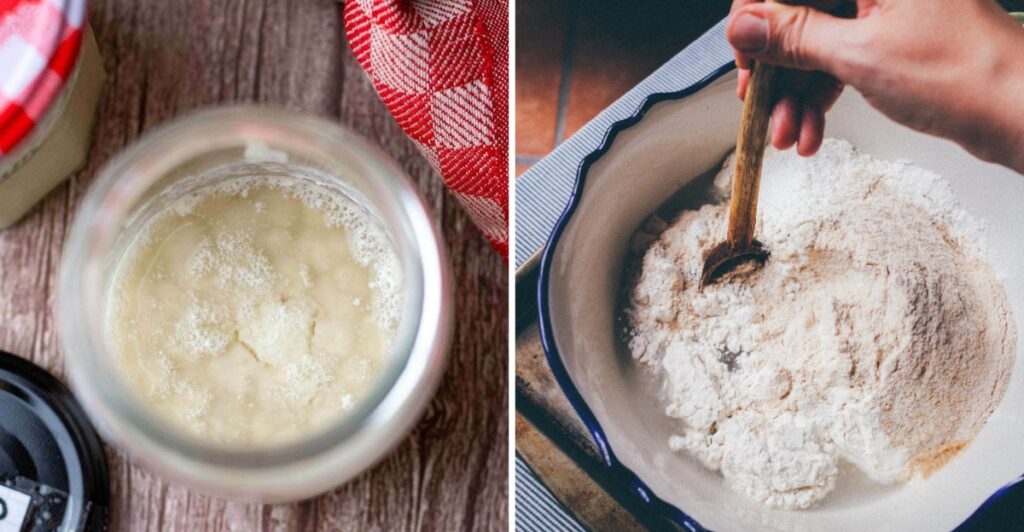
A sourdough starter is a jar full of tiny living helpers, wild yeast and bacteria that make your bread rise and taste tangy. Like any pet, it can get hungry, sleepy, or even sick when life gets busy.
The good news is that most starters are tough and can bounce back with a little care. Learning the warning signs early can save your starter and keep fresh, bubbly loaves coming out of your oven.
Dark Liquid Pooling on Top
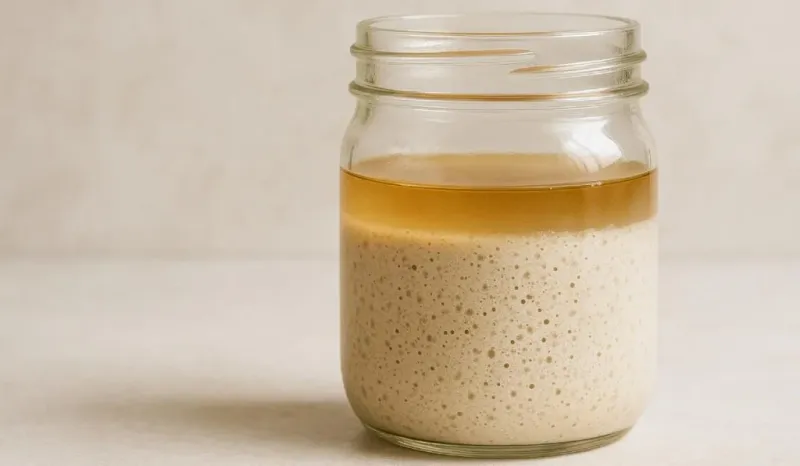
Picture opening your jar and finding a gray puddle sitting on top like murky pond water. Bakers call this liquid hooch, and it might look scary, but it is really just your starter saying it is starving.
Hooch is alcohol made by the yeast after it has eaten every last bit of flour. It can be clear, amber, gray, purple, or even black.
A thin film means your starter is a little hungry, while a thick, dark layer means it has been ignored for quite a while.
Fixing it is simple. You can stir the hooch back in if you love an extra sour flavor in your bread.
If there is a lot of it or it looks very dark, pour it off instead.
After that, give your starter a fresh meal of flour and water. To stop hooch from showing up again, feed more often or use a bigger feeding ratio.
Try 1 part starter to 2 parts flour and 2 parts water, or even 1:5:5 if it seems extra hungry.
Keeping the jar in a slightly cooler spot also slows things down. That way, your starter will not finish its food so fast between meals.
No Rise and Barely Any Bubbles
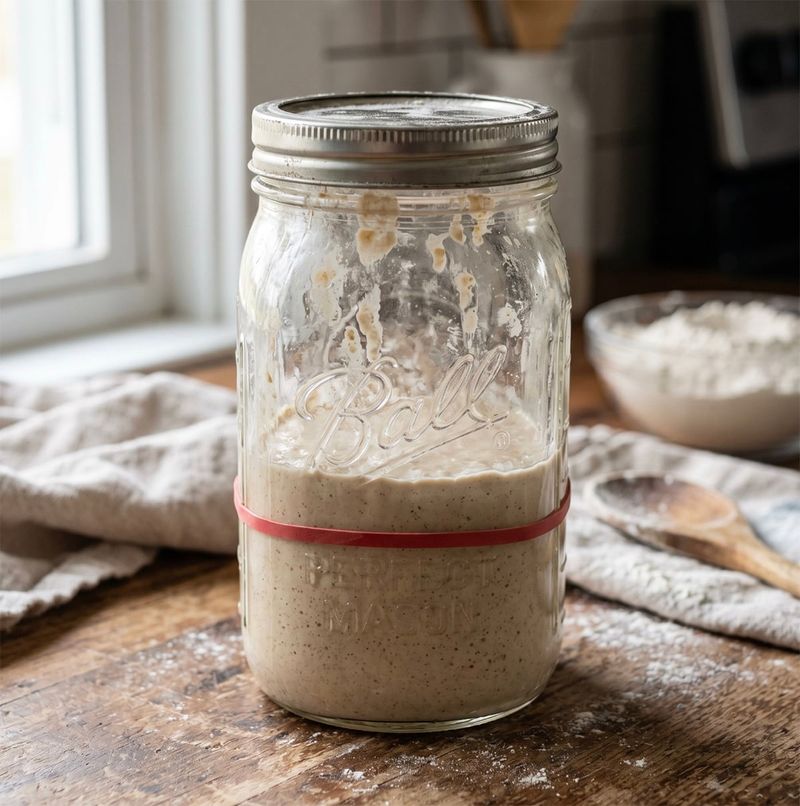
You fed it hours ago, marked the jar with a rubber band, and waited. Nothing happened.
A flat, quiet starter is frustrating, but it usually just needs better conditions.
A healthy starter should be full of bubbles and often double in size within 4 to 12 hours after feeding. If yours is lazy, temperature is the first thing to check.
Yeast loves warmth, ideally around 75 to 80 degrees Fahrenheit.
Cold kitchen? Move the jar on top of the fridge or into your oven with only the light turned on.
Just remember to take it out before you preheat for baking!
Next, look at your ingredients. Unbleached flour works best, and mixing in a spoonful of whole wheat or rye flour gives the microbes extra nutrients.
Filtered water is smart too, since chlorine in tap water can slow fermentation.
Feeding matters as well. Stick with a 1:1:1 or 1:2:2 ratio by weight, and feed every 8 to 12 hours.
Too little food starves the yeast, while too much dilutes it.
Finally, be patient. A neglected starter may need 3 to 5 days of steady feedings before it springs back to life.
Funky Smells That Make You Wince
Nail polish remover in your kitchen? If you sniff your starter and get hit with a sharp acetone smell, your yeast is basically shouting for dinner.
A healthy starter smells tangy, yeasty, or a little like beer. Strange odors mean something is out of balance.
The acetone scent happens when a starving starter builds up extra acid.
Luckily, the cure is easy. Feed it right away, then switch to feeding twice a day with a larger ratio.
Within a few days, that harsh smell should fade.
Gym socks or parmesan cheese is a different story. That stinky smell comes from butyric acid, and it can be fixed with some effort.
Feed twice daily at a 1:1:1 ratio, keep it warm at 75 to 80 degrees, and move it to a clean jar often for 3 to 5 days.
Here is where you draw the line. A truly rotten, garbage-like, or vomit smell, especially with weird colors, can mean bad bacteria have moved in for good.
If the stench is still there after three feedings in a row, toss it and start fresh.
Fun fact: many bakers name their starters, so saying goodbye can feel surprisingly emotional!
Fuzzy Mold or Pink Streaks
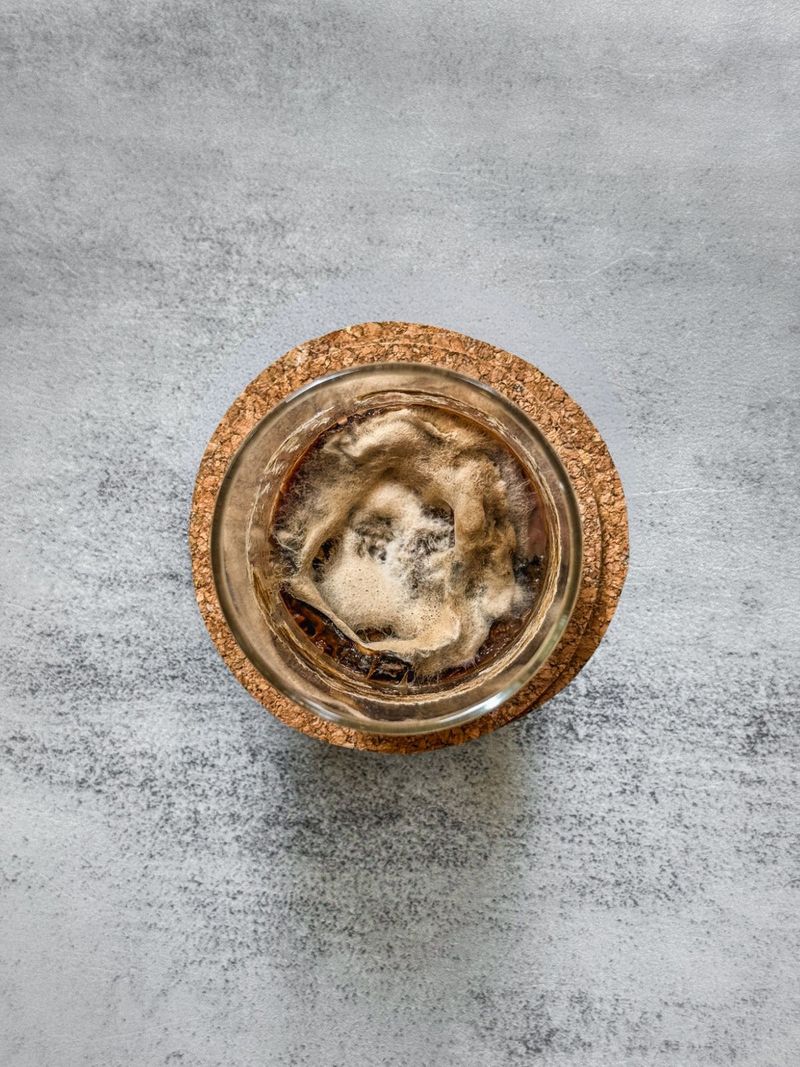
Some problems have a fix. Mold is not one of them, and this is the single most serious sign on the list.
Watch for fuzzy, raised spots in white, green, blue, or black. Also look out for pink, bright orange, or red streaks.
Those colorful streaks are often caused by a bacteria called Serratia marcescens, which you definitely do not want in your bread.
Do not try to scrape the mold off and keep going. Even if you only see a small patch on top, mold spores can spread through the whole starter where your eyes cannot see them.
Throw it out right away.
Then give your jar a serious cleaning. Wash it with hot, soapy water and sanitize it well before starting a new batch, so nothing nasty lingers behind.
How do you tell mold from hooch? Hooch is flat liquid that pours off easily.
Mold is fuzzy, raised, and stuck to the surface. If you are ever unsure, play it safe.
Losing a starter stings, but your health matters more than any loaf. A brand new starter only takes about a week or two to get going, and you will have learned a lot along the way.
Thin, Soupy Texture All the Way Through
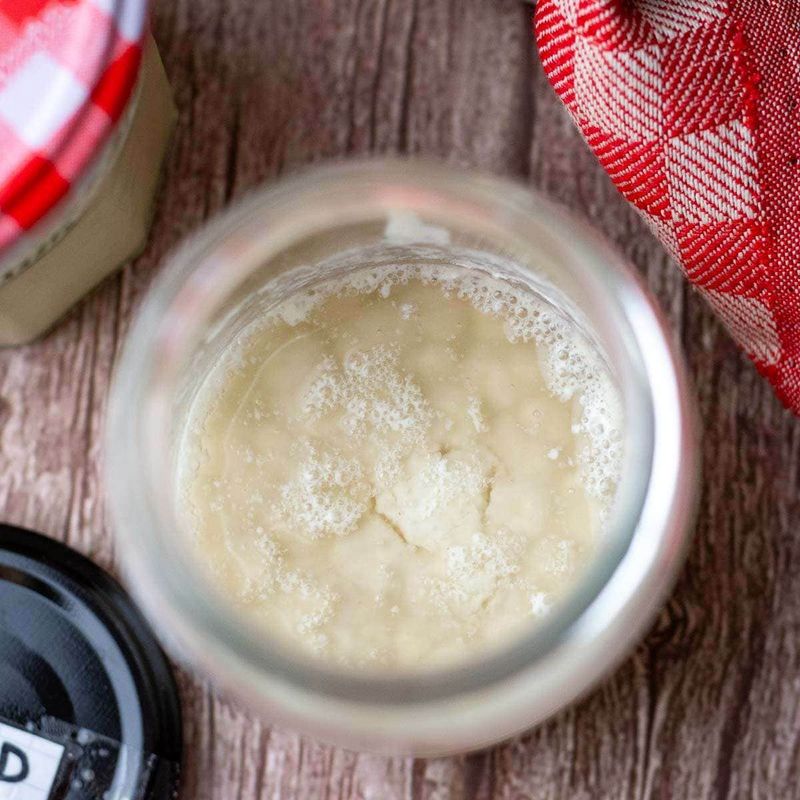
Think of a happy starter like thick pancake batter or a fluffy mousse. It should be thick but still pourable.
When yours turns soupy from top to bottom, not just a layer of liquid on top, something is off.
Measuring is often the culprit. If you scoop with cups instead of a scale, you might be adding way too much water, since water weighs more than flour.
A cheap digital kitchen scale solves this problem fast.
Once you weigh everything, try adding a little extra flour or using slightly less water at each feeding. Keep adjusting until the texture looks right.
Small changes make a big difference here.
Heat can also make a starter runny. In a hot kitchen, the microbes munch through their food super quickly and break down the structure.
Try keeping the jar below 80 degrees Fahrenheit, maybe in a shady cupboard.
Steady feeding is your last tool. A starter that eats on a regular schedule is less likely to over-ferment and turn into liquid.
Bonus tip: put a piece of tape on the jar and write the time you fed it. That little note keeps your routine on track.
A Dried Out, Crusty Disc
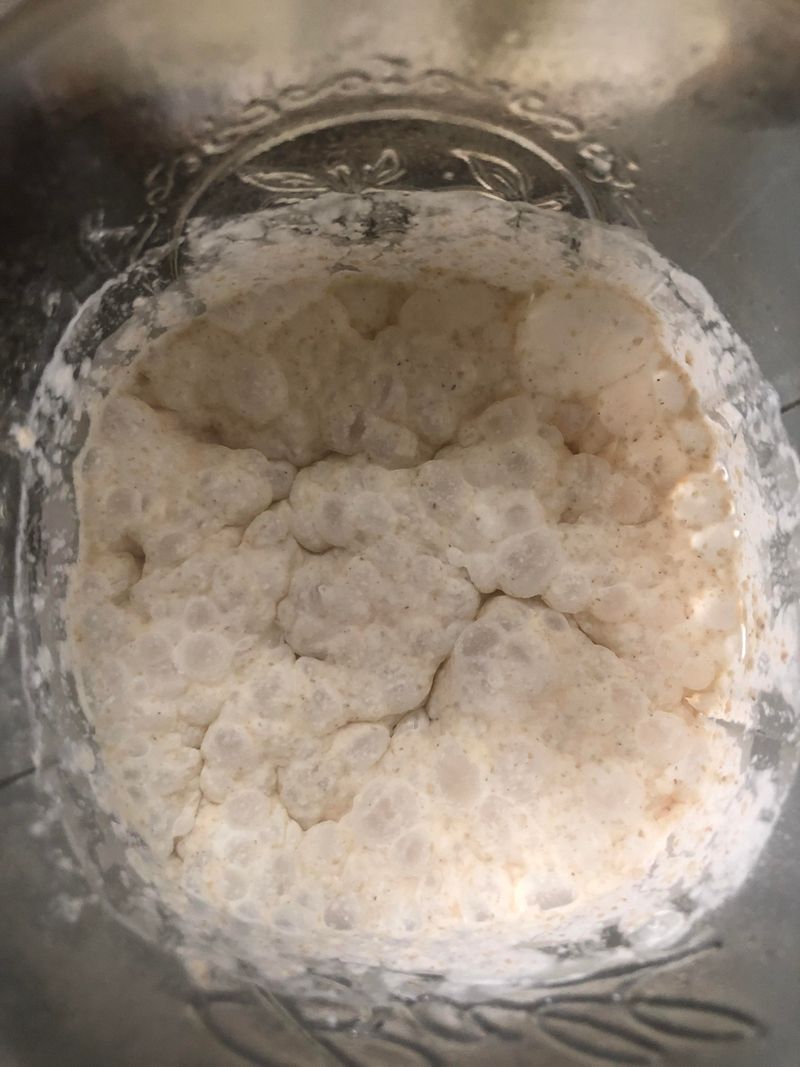
Maybe you went on vacation and forgot your starter on the counter. When you got home, it looked like a hard, chalky hockey puck.
Is it gone forever? Not always.
If only the top has formed a dry, grayish skin, you are in luck. Just peel or scoop away the crusty layer.
Underneath, you will often find soft, healthy starter waiting to be fed.
Take a spoonful of that good part and give it fresh flour and water. Within a feeding or two, it may start bubbling again like nothing happened.
A completely dried block takes more work. Break it up into small crumbs, crushing it as fine as you can.
Then add water, let it soften, and begin feeding it every day.
Give it three or four days of regular meals. If you still see no bubbles or rise after that, starting over might be the easier path.
Here is a cool fact: some bakers dry their starter on purpose as a backup! Spread thin on parchment and dried, it can be stored for months.
So drying out is not always a death sentence for these hardy microbes.
Sleepy Starter Fresh From the Fridge
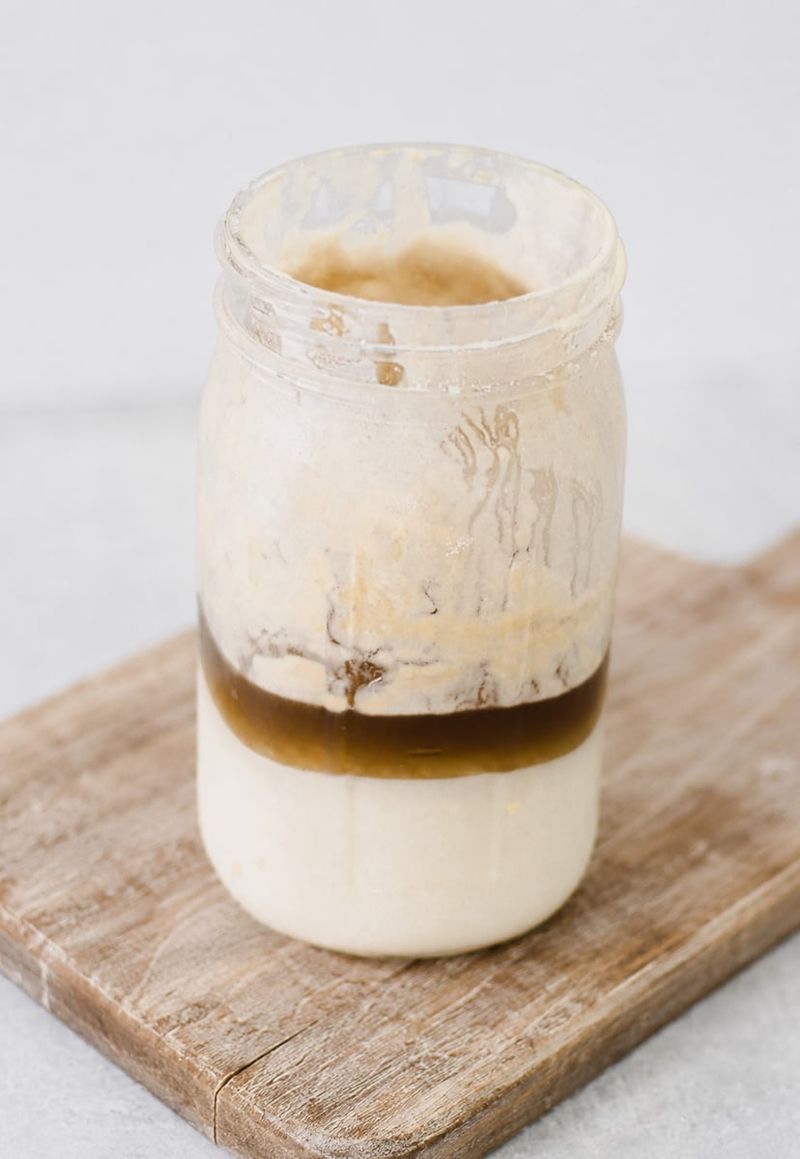
Cold storage is like a long nap for your starter. In the fridge, the yeast slows way down to save its food, so it often looks dull or grows a layer of dark hooch.
Do not panic when it seems lifeless at first. Being sluggish right out of the fridge is totally normal.
It just needs time to wake up and stretch.
Start by letting the jar sit until it reaches room temperature. Then stir in the hooch or pour it off, whichever you prefer.
Next, scoop out a small amount and begin regular feedings once or twice a day at room temperature. A bigger ratio, like 1:3:3 or even 1:5:5, gives those groggy microbes plenty to eat and helps them recover faster.
Very neglected starters may need 2 to 5 days before they are fully active again. You will know it is ready when it doubles within 6 to 8 hours after a feeding.
Planning a weekend bake? Pull your starter out a few days early.
That small bit of planning means a lively, bubbly starter on baking day, and a lighter, airier loaf for everyone at the table.